This is a new topic in 12.03.
This is a new topic in 12.04.
Content highlighted in yellow is new in 12.03.
Content highlighted in blue is new in 12.04.
System Configuration – Individual Timesheet Entry
The System Configuration – Individual Timesheet Entry screen allows you to manage the list of super approvers and control the level of access to individual timesheet data for each level of management.
To open this screen, click Setup in the Administration section of the side menu, then click System Configuration – Individual Timesheet Entry.
Management Settings
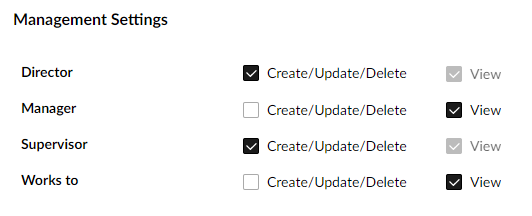
In the Management Settings tab, you can control the level of access to timesheet data for each level of management on the Individual Time Entry screen. These management roles are configured in the ERP+ Personnel Workbench. There are three possible levels of access:
-
If Create/Update/Delete is ticked, users of that role will be able to create, update and delete timesheet data for the employees assigned to them.
-
If Create/Update/Delete is unticked and View is ticked, users of that role will be able to view timesheet data for the employees assigned to them, but will not be able to make any changes to it.
-
If View is unticked, users of that role will not be able to view timesheet data for the employees assigned to them, or make any changes to it.
Click  to save any changes you have made.
Master list for Super Approvers
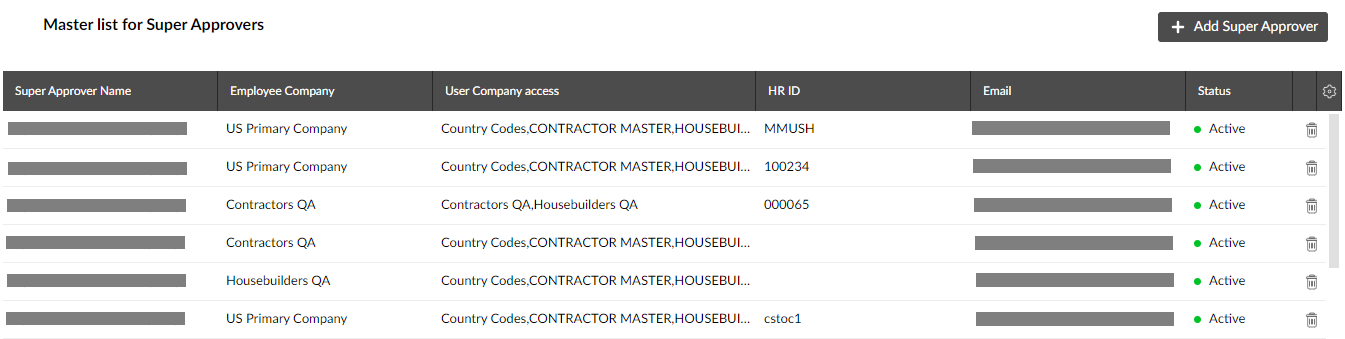
The Master list for Super Approvers tab contains a list of all available super approvers. Every timesheet group must have at least one super approver assigned to it.
Adding a super approver
-
Click
 . This opens the Add Super Approver window.
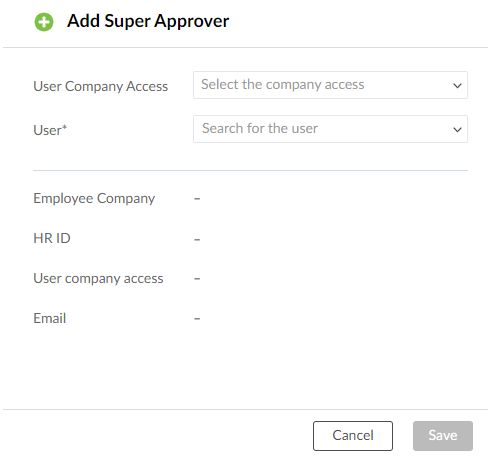
-
Select the company or companies the super approver will have access to from the User Company Access drop-down list. The super approver will not be able to approve timesheets for employees from companies they do not have access to.
-
Select the user you wish to make a super approver from the User drop-down list. Once you select a user, the remaining four fields will be filled automatically.
-
Click
to save the super approver and add them to the master list.
Removing a super approver
To remove a super approver, click the trash can icon in the right-most column. You will receive a warning popup asking if you are sure.
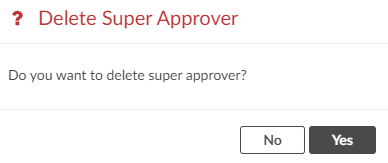
Click  to confirm.